
By now you've probably had your fill of pumpkin - pies, cookies, bread, lattes, scones (ok, who am I kidding, I don't know about you, but I never grow tired of the pumpkin scones sold by a large, well-known coffee shop).
In the midst of your pumpkin fatigue, did you know, you can preserve your pumpkins for later use?
You can!
And, it's easy!
There are two kinds of pumpkins: a large one called a "carving pumpkins", used to make jack-o-lanterns at Halloween, and a smaller, sweeter one called a "pie pumpkin". Both can be used for cooking, but as the name implies, it's the pie pumpkin that is better suited for this endeavor.
 |
| The ladies LOVE pumpkin! |
It is not recommended that you home can pumpkin unless they are cubed and then they must be pressure canned. It has to do with density, issues of pH and a really nasty fellow named, Clostridium botulinum (yes, botulism).
If you're a bit of a risk taker (I am not) and want to try your hand at it, please do your research, starting here: The National Center for Home Food Preservation. They have lots of information about food preservation and storage.
The safest way to preserve your pumpkins is freezing and there are two ways to do this.
Freeze raw pumpkin chunks:
This is probably the easiest, as it requires the least amount of steps, but I was never great at carving pumpkins, so I'm a bit wary of peeling them. If you're an ace with a peeler or knife, doing it this way might be for you.
Wash and peel the pumpkin, remove the seeds (save to roast later), and cut the pumpkin into 1-inch chunks. Place chunks on a freezer safe baking pan and flash-freeze before storing in freezer bags. Doing this will prevent the pumpkin from sticking together.
Freeze pumpkin purée:
While there are a few more steps, I prefer doing it this way - I don't need to be very skilled with a knife and when thawed, it's ready to be used in any recipe.

Cut the top off of a clean pumpkin.

Scoop out the seeds and set aside to roast later.

Slice the pumpkin into quarters.

Place in oven, uncovered and roast at 375° for 45-minutes or until fork tender.
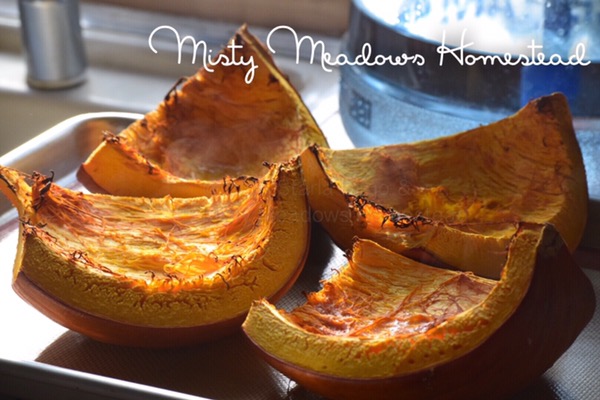
They will be golden brown. Allow too cool before proceeding.

Scoop out the roasted pumpkin flesh, leaving the skin behind. You can freeze the flesh now (and purée later) or you can throw it in a food processor and purée it now.
I don't have any photos of this step as I ran into a bit of a snafu.
As you might remember, we recently moved to our Homestead. We still have many things yet to unpack or even find our food processor is one such item. So, rather than use the recommended kitchen tool, I tried using a blender, which would have worked had I added some additional liquid, however, adding liquid may compromise your finished product.
 |
| While trying to take photos for this post, one of the silly barn kitties decided to photo bomb! |
Needless to say, it didn't work very well and I ended up hand s'mashing (if you say it just right, you can hear my irritation over the issue - lol! Oh, and those that know me personally, might a musical reference) my pumpkin before scooping one and two cup portions into food-saver bags for freezing. You can also use regular, zipping freezer bags.
Let's hear from you!!
There are so many things to do with Pumpkin purée. What is your favorite thing to do with it? Leave a comment below.

If you like this post, please feel free to share and please click the follow button on the side or return to Misty Meadows Homestead to follow our adventures... Oh! Wait! Before you go - don't forget to subscribe to our YouTube channel! Thanks!
Content and Photos by Misty Meadows Homestead and S.Lago © All Rights Reserved


No comments:
Post a Comment